Wednesday, October 30, 2013

Halloween Spiderweb Cheesecake


Photo: Spiderweb Cheesecake
www.holidaycottagepage.com/spiderweb-cheesecake-recipe/

Ingredients
  1. 1 envelope unflavored gelatin
  2. 1/4 cup cold water
  3. 2 packages (8 ounces each) cream cheese, softened
  4. 1/2 cup sugar
  5. 1/2 cup heavy whipping cream
  6. 1 teaspoon vanilla extract
  7. 1 chocolate crumb crust (8 or 9 inches)
  8. 2 tablespoons semisweet chocolate chips
  9. 1 tablespoon butter
Instructions
  1. In a small saucepan, sprinkle gelatin over water; let stand for 1 minute. Heat gelatin; stir until dissolved. Remove from the heat; cool slightly. In a bowl, beat the cream cheese and sugar until smooth. Gradually beat in cream, vanilla and gelatin mixture until smooth. Pour into crust.
  2. In a microwave, melt chocolate chips and butter; stir until smooth. Transfer to a heavy-duty resealable bag; cut a small hole in a corner of bag. Pipe a circle of chocolate in center of cheesecake. Pipe evenly spaced thin concentric circles about 1/2 in. apart over filling. Beginning with the center circle, gently pull a toothpick through circles toward outer edge. Wipe toothpick clean. Repeat to complete web pattern. Cover and refrigerate for at least 2 hours before cutting. Yield: 6-8 servings.
~Bridget

Bewitching Sugar Cookies

Photo: Bewitching Sugar Cookies
www.holidaycottagepage.com/bewitching-sugar-cookies/ I think these are SO cute!  DOn't you just LOVE the green faces?!

Ingredients:
  1. 1 roll (16.5 oz) Pillsbury® refrigerated sugar cookies
  2. 1/4 cup all-purpose flour
  3. 3 drops green food color
  4. 15 whole cashews
  5. 30 semisweet chocolate chips
  6. 3/4 cup chow mein noodles
  7. 1 cup semisweet chocolate chips
  8. Candy sprinkles or colored sugar, if desired
Instructions:
  1.  Heat oven to 350°F. Line cookie sheet with waxed paper. In large bowl, break up cookie dough. Stir or knead in flour until well blended. Reshape dough into 7-inch roll; press sides of roll to form a triangle-shaped roll. Cut 15 (1/4-inch) triangle-shaped slices from roll of cookie dough (for witch hats), reserving remaining dough for witch faces. (If dough is too soft to cut into slices, refrigerate up to 30 minutes.) Place slices on cookie sheet; place in refrigerator.
  2.  In same bowl, break remaining cookie dough into pieces. With spoon or rubber spatula, stir in green food color until well blended. Shape dough into a roll about 4 inches long. Cover with plastic wrap; refrigerate 15 minutes.
  3.  Remove sliced dough and roll of dough from refrigerator. Cut roll into 15 slices; on 2 ungreased large cookie sheets, place slices about 3 inches apart (leaving room to add hats). Press a hat shape onto each round slice on cookie sheets.
  4.  For each cookie, use tip of spoon to make opening at bottom of round cookie through dough to cookie sheet to make mouth. Add 1 cashew for nose and 2 chocolate chips for eyes. Poke noodles into sides and under hat for hair.
  5.  Bake 9 to 12 minutes or until edges are light golden brown (cookies will continue to brown slightly as they cool). Cool 1 minute; remove from cookie sheets to cooling racks.
  6.  In shallow microwavable dish, microwave 1 cup chocolate chips uncovered on High 25 to 30 seconds; stir until smooth. (If necessary, microwave 15 seconds longer.) Spread melted chocolate on hats. Make ribbon on hat brim with candy sprinkles.

~Bridget

Apple Pie Bites on a Sitck


Photo: Apple Pie Bites on a Stick for Fall 
.holidaycottagepage.com/apple-pie-bites-stick-fall/

Ingredients:
  1. 1 large Granny Smith apple
  2. 1 small ice cream scoop*
  3. 1 9-inch refrigerated pie crust (Pillsbury Refrigerated Pie Crusts used here)
  4. 3-inch circle cookie cutter
  5. 2 tablespoons sugar, plus additional
  6. 1/2 teaspoon cinnamon, plus additional
  7. 1/4 teaspoon nutmeg
  8. 1 egg
  9. flour
  10. rolling pin
  11. sticks or skewers (optional)
Instructions:
  1. Preheat oven to 425 degrees F. Pare and core the apple. Use the scoop or just a knife to make apple chunks about 1-inch to 1 1/4-inch across. In a small bowl, mix 2 tablespoons sugar, 1/2 teaspoon cinnamon and the nutmeg. Dip and roll the apple pieces in the sugar mixture until fully coated.
  2. Unroll a refrigerated pie crust and cut out circles with the cutter. Gather the scraps and re-roll on a floured surface about 1/8-inch thick. Cut out remaining circles. You’ll need one for each apple piece. Place a sugar-coated apple piece in the center of a pie crust circle and gather the pie crust around the top of the apple and pinch to seal. (Some of the apple may peek through at the top.) Place on a baking tray lined with parchment paper. Repeat with the remaining pie crust circles and apple pieces. Beat the egg with a couple teaspoons of water, and brush over the pie crusts. Use the remaining sugar mixture, or, mix more cinnamon and sugar together, and sprinkle over the apple pies.
  3. Bake for 14 to 16 minutes until the crusts are browned. Remove from the oven and insert the sticks. As the pie bites cool, the sticks will become more secure. (More secure, not totally secure, so don’t go waving these around.) Makes about 10 bites.
Notes:
  1. * I used a small scoop 1 1/4-inch in diameter. You don’t really need an ice cream scoop since my apple “balls” were more “chunks” anyway, you could use a knife to cut pieces about 1 inch to 1 1/4 inch cubed.


~Bridget

Halloween Veggie Skeleton Relish Tray


Photo: Veggie Man
www.holidaycottagepage.com/halloween-veggie-skeleton-2/


Ingredients:
  1. Head--lettuce leaves, sliced olives, veggie dip in a small bowl
  2. Body--celery, baby carrots, bell pepper, mushrooms, cherry or grape tomatoes, cauliflower, broccoli, cucumbers
Instructions:
  1. Arrange the veggies on a platter in the shape of a skeleton, top with an appropriate sized bowl of veggie dip for the head.

~Bridget

Bite-Sized Swirled Pumpkin Cheesecakes


Photo: Bite Size Swirled Pumpkin Cheesecake
www.holidaycottagepage.com/bite-sized-swirled-pumpkin-cheesecake/
 A delicious Fall treat, these are yummy and easy to make!

Ingredients:
  1. 12 Cupcake liners
  2. Nonstick cooking spray
  3. 2 pkg. (8 oz. each) Philadephia Cream cheese, at room temperature
  4. 1/2 cup Granulated sugar
  5. 1 1/2 Tbsp. All-purpose flour
  6. 1 tsp. Vanilla extract
  7. Pinch of salt
  8. 2 large Eggs
  9. 1/2 cup Pure Pumpkin
  10. 2 Tbsp. Cafe Collection Vanilla Latte Coffeemate
  11. 2 tsp. Ground cinnamon
Instructions:
  1. Preheat oven to 300° F.
  2. Line 12-cup muffin tin with liners; coat liners with nonstick cooking spray.
Beat cream cheese, sugar, flour, vanilla extract and salt in large mixer bowl until smooth.
  3. Beat in eggs one at a time, beating well after each addition.
  4. Transfer 1/2 cup batter to a medium bowl.
  5. Add pumpkin and Coffee-mate; stir until blended.
  6. Divide white cream cheese batter evenly among prepared cups; top evenly with pumpkin batter.
  7. Swirl batters with butter knife.
Bake for 16 to 18 minutes or until just set.
  8. Cool completely in pan on wire rack.
  9. Cover and refrigerate for 4 hours before serving

~Bridget

Monday, October 28, 2013

Monster Stack Cookies


Photo: Monster Stack Cookies
www.holidaycottagepage.com/monster-cookie-stacks/


Ingredients:
  1. 1 roll (16.5 oz) Pillsbury® refrigerated sugar cookies
  2. Pink, purple, brown or multicolored coarse decorating sugar
  3. Liquid food color, as desired
  4. 1 container (12 oz) vanilla whipped ready-to-spread frosting
  5. 1 tube (0.68 oz) black decorating gel (not food color)
  6. 30 miniature marshmallows
  7. 3/4 cup desired monster cereal, such as Frankenberry®, Boo Berry®, Count Chocula®, Yummy Mummy™ or Frute Brute™
Instructions:
  1.  Heat oven to 350°F. Spray 3 cookie sheets with cooking spray.
  2.  Shape cookie dough into 45 small balls. Roll each ball in desired color of decorating sugar. Place balls 1 inch apart on cookie sheets.
  3. Bake about 10 minutes or until edges are light brown. Cool 2 minutes; remove from cookie sheets to cooling racks. Cool completely, about 15 minutes.
  4.  Stir food color into frosting until no streaks remain. Frost cookies, and while frosting is still soft, make 15 stacks of 3 cookies each.
  5.  To make eyes, place small drop of black decorating gel in center of each miniature marshmallow. Place 2 eyes on each cookie stack. Cover remaining frosted area with cereal.


~Bridget

Bubbling Cauldron Cheese Dip with Bat Wing Dippers - Great Halloween Potluck Dish!

 Photo: Bubbling Cauldron Cheese Dip with Bat Wing dippers
www.holidaycottagepage.com/bubbling-cauldron-cheese-dip-bat-wing-dippers/

Ingredients
  1. 1 loaf (16 oz) prepared cheese product, cut into cubes
  2. 1 container (8 oz) reduced-fat chives-and-onion cream cheese
  3. 1 cup shredded sharp Cheddar cheese (4 oz)
  4. 1/2 cup milk
  5. 1 large clove garlic, finely chopped
  6. 12 oz blue tortilla chips (from two 9-oz bags)
Instructions:
  1. In 1 1/2-quart microwavable bowl, mix all ingredients except tortilla chips. Microwave uncovered on High 5 to 8 minutes, stirring every 3 minutes, until cheese is melted and dip is smooth.
  2.  Serve warm with tortilla chips.
Notes:
  1. To make on the stovetop, mix all ingredients except the tortilla chips in a double boiler. Cook over hot water on medium heat, stirring frequently, until melted and smooth.
  2. To easily remove the skin from a clove of garlic, smash the clove with the flat side of a heavy knife to crack the skin, and then slip it off.

~Bridget

Frankie Cupcakes Recipe


Photo: Frankie Cupcakes Recipe
www.holidaycottagepage.com/frankie-cupcakes-recipe/

Ingredients:
  1. Pretzel sticks
  2. Large marshmallows
  3. Corn syrup
  4. Green colored sugar
  5. 1 can (16 ounces) vanilla frosting
  6. Purple and black paste food coloring
  7. Cupcakes of your choice
  8. Purple nonpareils
  9. Candy coated licorice, spearmint leaves and Nerds candies
  10. 1 can (16 ounces) chocolate frosting
Instructions:
  1. Insert a pretzel stick into a flat end of each marshmallow. Using a clean paint brush, lightly coat marshmallows with corn syrup. Immediately roll top and sides in green colored sugar; allow to dry for 20 minutes.
  2. Meanwhile, set aside 1/4 cup vanilla frosting. Tint remaining vanilla frosting purple and spread over cupcakes. Roll edge of cupcakes in nonpareils; set aside.
  3. To decorate face, press candy coated licorice bolts into each side. Cut a small piece of spearmint leaf into an eyebrow, press cut side onto face. Using remaining vanilla frosting, pipe eyes; add Nerd candy eyeballs. Pipe chocolate frosting onto faces for mouths and stitches as desired.
  4. Carefully insert pretzel stick into the center of each cupcake. Tint remaining chocolate frosting black. Using pastry tip 233, add black hair.
  5. If desired, use black frosting to pipe the collar of a suit jacket outline. Fill in the center with black. Yield: Varied.

~Bridget

Pumpkin Torte Recipe


Photo: Pumpkin Torte Recipes
www.holidaycottagepage.com/pumpkin-torte-recipe/ 
Ingredients:
  1. 1 package yellow cake mix (regular size)
  2. 1 can (15 ounces) solid-pack pumpkin, divided
  3. 1/2 cup milk
  4. 4 eggs
  5. 1/3 cup canola oil
  6. 1-1/2 teaspoons pumpkin pie spice, divided
  7. 1 package (8 ounces) cream cheese, softened
  8. 1 cup confectioners' sugar
  9. 1 carton (16 ounces) frozen whipped topping, thawed
  10. 1/4 cup Marzetti's® Caramel Dip
  11. 1/3 cup chopped pecans, toasted
Instructions:
  1. In a large bowl, combine the cake mix, 1 cup pumpkin, milk, eggs, oil and 1 teaspoon pumpkin pie spice; beat on low speed for 30 seconds. Beat on medium for 2 minutes. Pour into two greased and floured 9-in. round baking pans.
  2. Bake at 350° for 25-30 minutes or until a toothpick inserted near the center comes out clean. Cool for 10 minutes before removing from pans to wire racks to cool completely.
  3. In a large bowl, beat the cream cheese until light and fluffy. Add the confectioners' sugar and remaining pumpkin and pumpkin pie spice; beat until smooth. Fold in whipped topping.
  4. Cut each cake horizontally into two layers. Place bottom layer on a serving plate; spread with a fourth of the filling. Repeat layers three times. Drizzle with caramel topping; sprinkle with pecans. Store in the refrigerator. Yield: 10-12 servings.
Another good one from A Taste of Home 

~Bridget

Halloween Layered Fudge Recipe

 How CUTE is this?  And I made it and it's super good!


Photo: Halloween Layered Fudge Recipe
www.holidaycottagepage.com/halloween-layered-fudge-recipe/
Ingredients:
  1. 1 teaspoon butter
  2. 2 cups (12 ounces) semisweet chocolate chips
  3. 1 can (14 ounces) sweetened condensed milk, divided
  4. 8 ounces white candy coating
  5. 1/4 teaspoon orange extract
  6. 2 to 4 drops orange paste food coloring
Instructions:
  1. Line an 8-in. square pan with foil; butter foil and set aside.
  2. In a microwave-safe bowl, heat chocolate chips and 1 cup milk on high for 30 seconds; stir. Repeat until mixture is smooth. Pour into prepared pan. Chill for 10 minutes.
  3. Meanwhile, in a microwave-safe bowl, melt candy coating with remaining milk; stir until smooth. Stir in extract and food coloring. Spread over chocolate layer.
  4. Chill for 1 hour or until firm. Using foil, remove fudge from pan. Cut into 1-in. squares. Yield: about 2 pounds.

~Bridget

Wednesday, October 23, 2013

Monster Munch Popcorn Recipe

 
Ingredients:
  1. 1 bag of Popped Popcorn
  2. White Chocolate Almond Bark
  3. Halloween M&M’s® or Reese’s Pieces®
  4. Candy Eyeballs (found in the baking section of your local craft store)
  5. Colorful Sprinkles
Instructions:
  1. Melt the white chocolate almond bark according to the directions on the package.
  2. Drizzle the melted almond bark over the popcorn and stir to coat.
  3. Stir in the candy eyeballs, M&M’s® and Reese’s Pieces ® making sure to coat them with the melted almond bark as well.
  4. Place the popcorn mixture on a large piece wax paper. Shake the sprinkles onto the popcorn and let cool. Break into pieces and enjoy!
  5. TIP: For extra fun try adding a few drops of food coloring to the almond bark before drizzling over the popcorn.
~Bridget

Pier One BIG Savings Coupon

 HUGE savings on those larger purchases at Pier One now through Friday!
Daily Dealies.
~Bridget

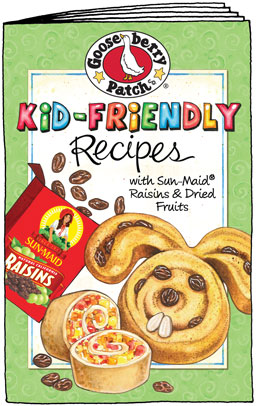
FREE Gooseberry Patch Kid-Friendly Recipe Book

 Gooseberry Patch - Keep it simple. Make it special.
 I just love Gooseberry Patch.  I love getting their catalogs, and I love that they're all illustrated by hand.  They are now offering a FREE Kid's Cookbook that you can both download and immediately use or they will mail it to you if you prefer.   There are recipes like "Cinnabunnies" and "Cheery Cherry Oatmeal" that are easy to make and healthy and delicious to eat.

 We downloaded the PDF and already tried a few yummy things, looking  right at  the iPad screen and following along.  We also asked for the hard copy to be mailed to the house.   We can't wait to receive ours!  They sell this on their site for $4.95 but right now you can get it free!


Free Gooseberry Patch Kid Friendly Recipe Book

Tuesday, October 22, 2013

Macy's Coupon Codes: Save 20% and get FREE SHIPPING!

Macy's 20% off ______________________The Sale is on at Macy's and below are several ways to save!

20% off

Use Code:  PRES
Exp:  10/25/13
 _______________________

15% off $100

Use Code:  TXTCLB
Some exclusions apply; see site
Exp: 10/31/13
___________________________

Free shipping on $99

No code needed!
Just shop Macys.com and save!
Without coupon, shipping starts at $5.95 - some exclusions apply; see site
Exp:  Oct 31, 2013
~Bridget

Ultimate Chocolate Cupcake Stuffed w/ a CHEESECAKE Pumpkin Recipe!


 Photo: Ultimate Chocolate Cupcake Stuffed with Cream Cheese
www.holidaycottagepage.com/ultimate-chocolate-cupcake-stuffed-w-cheesecake-pumpkin-recipe/


Cupcakes: recipe adapted from Cook's Illustrated

Ingredients:
  1. 3 ounces semi-sweet or bittersweet chocolate, finely chopped
  2. 1 ounce (1/3 cup) Dutch-processed cocoa
  3. 3/4 cup hot coffee*
  4. 6 tablespoons vegetable oil
  5. 2 large eggs
  6. 2 teaspoons white vinegar
  7. 1 teaspoon vanilla extract
  8. 3/4 cup granulated sugar
  9. 3/4 cup (4 1/8 ounce) bread flour**
  10. 1/2 teaspoon baking soda
  11. 1/2 teaspoon salt -
Ganache Frosting & Decorations:
  1. 12 ounces semi-sweet chocolate, finely chopped
  2. 1 cup heavy whipping cream
  3. Optional: Halloween sprinkles or candy
  4. Mini Cheesecake Pumpkins (makes 40)
Pumpkin Cheesecake Centers Ingredients:
  1. Butter, to coat the inside of your pumpkin molds
  2. 16 ounces cream cheese, softened
  3. 2/3 cup sugar
  4. 1/3 cup heavy whipping cream
  5. 2 large eggs
  6. 1 teaspoon pure vanilla extract
  7. Orange and green food coloring - you can use natural food coloring too, if you prefer
Supplies:
  1. Food processor, optional
  2. 2 Wilton Mini Pumpkin Molds with 24 cavities in each
  3. 2 baking sheets
  4. "Food use only" paint brush
  5. whisk 
  6. 22 Halloween cupcake wrappers
  7. cupcake pan
  8. 2 large pastry bags
  9. optional: food processor (Very helpful if you have one)
  10. hand mixer (If you don't!)
  11. large star pastry tip - and keep them frozen until needed. When you paint in the green filling, be sure to fill the entire stem area, so that when you cut into the cupcakes you have a nice pumpkin shape.
Instructions:
  1. Make cupcake batter. Pour finely chopped chocolate and cocoa powder into a large mixing bowl. Add hot coffee and stir until chocolate melts. Place in the refrigerator to cool for about 20 minutes.
  2. Once cooled, whisk in oil, eggs, white vinegar, and vanilla extract. In a separate bowl whisk together the sugar, flour, baking soda, and salt. Add it to the chocolate bowl and whisk until smooth.
  3. Place cupcake liners in cupcake pan. Pour a thin layer of batter into each of the cupcake liners.
  4. Remove the Mini Cheesecake Pumpkins from the freezer. Un-mold them, and stick 2 cheesecakes together (put their backsides together) then place them in the center of each cupcake liner.
  5. NOTE: It is very important that you know which way your cheesecake pumpkins are facing. Later when you cut into a cupcake to reveal the pumpkin, you want to cut across the front not the side.
  6. Fill the cupcake liners up over the cheesecake pumpkins. I felt it was easiest to put my batter in a large disposable pastry bag and pipe it into the cups. Once all the cups are filled allow them to sit at room temperature for about 20 minutes. While you are waiting, preheat your oven to 350 degrees.
  7. [Pin on Pinterest] =)
  8. Bake the cupcakes for 20-22 minutes until they are set around the edges and puffed in the middle. As the cupcakes cool, they will sink a bit in the center. Allow them to cool completely.
  9. Meanwhile, make the chocolate ganache frosting.
  10. Place chopped chocolate in the bowl of a food processor. Pulse until chocolate is fine crumbs.
  11. Heat heavy whipping cream in a small saucepan over medium heat. Stir often until it just comes to a boil. Pour the hot cream over the chocolate, put lid on the food processor bowl, and let sit for 2-3 minutes. Pulse for 3 seconds. Remove lid and scrape down the sides and bottom of the food processor bowl. Return lid and pulse for 5 more seconds or until the mixture, which is called ganache, is smooth. Don't over-mix your ganache or it will turn grainy as it sets up.
  12. Note: A food processor makes easy work of creating a chocolate ganache. If you don't have one, finely chop your chocolate and put it in a microwave safe mixing bowl. Boil cream as above and pour over chocolate and let sit for 2-3 minutes. Use a whisk to create an emulsion. Begin by stirring just in the center of the bowl, then slowly bring the whisk out to the edge of the bowl. Stir just until combined and the ganache is smooth. If you have chunks of chocolate remaining, place entire bowl in microwave and heat on high for 10 seconds. Stir until melted.
  13. Pour ganache into a mixing bowl and chill in the refirgerator for 15 minutes, then remove and stir. Refrigerate for 15 more minutes. Then use an electric mixer to beat the ganache until it's lighter in color (left photo.) The frosting will not hold stiff peaks at this point, it should fall off the beaters. Allow it to sit at room temperature for 10-15 minutes, but no more. Beat for 5 more seconds and it should now hold stiff peaks (right photo.)
  14. Immediately spoon the frosting into a piping bag fitted with a large star tip. Pipe big swirls over cooled cupcakes. This frosting is rather stiff and will actually harden slightly much like a chocolate truffle. You can easily bite into it and it has an intense chocolate flavor, but it is not soft like a butter cream style frosting.
  15. Decorate with Halloween sprinkles or candy, if desired. I found it helpful to just sprinkle the front side of each cupcake. That way when I went to cut into them, I knew which direction the pumpkin would be facing.
  16. Keep cupcakes stored in the refrigerator for up to 4 days. Allow them to come to room temperature before serving so that the ganache frosting and the cheesecake are smooth and creamy and will melt in your mouth.
  17. When you cut into them, use a sharp knife to cut across the front of the cupcake about 1/4th of the way into the cupcake for the best results.
Notes:
  1. *These cupcakes will not taste like coffee, I promise. If they did, I wouldn't like them. It just intensifies the chocolate flavor.
  2. **Definitely use bread flour. If you use all purpose flour, the cupcakes won't hold together as well. You need the extra gluten in the bread flour to keep the structure of the cupcake.
Photo: Frost on the pumpkin this morning! How's the weather where you are?
~Bridget

Eyeball Cookies & A Cute Jack-O-Lantern Cake

 EYEBALL COOKIES
Photo: Eyeball lCookies
www.holidaycottagepage.com/eyeball-cookies-recipe/
Ingredients:
  1. 5 ounces white baking chocolate, chopped, divided
  2. 20 to 25 vanilla wafers
  3. Blue paste food coloring
  4. 1/2 cup semisweet chocolate chips
  5. Red liquid food coloring
Instructions:
  1. In a microwave, melt 4 ounces of white chocolate; stir until smooth. Dip vanilla wafers in melted chocolate; allow excess to drip off. Place on a waxed paper-lined baking sheet. Chill until set.
  2. Melt remaining white chocolate; stir until smooth. Tint blue. Spread a small amount onto the center of each cookie; place a chocolate chip in the center.
  3. For bloodshot eyes, use a toothpick dipped in red food coloring to draw lines from blue circles to outer edges of wafers. Chill until set. Store in an airtight container. Yield: 20-25 servings.

JACK-O-LANTERN CAKE
 Photo: Jack-O-Lantern Cake 
www.holidaycottagepage.com/jack-o-lantern-cake-2/
Ingredients:
  1. 2 boxes Betty Crocker® SuperMoist® devil's food or white cake mix
  2. Water, vegetable oil and eggs or egg whites called for on cake mix box
  3. 2 containers (1 lb each) Betty Crocker® Rich & Creamy vanilla frosting
  4. Yellow and red food color
  5. 1 green flat-bottom ice-cream cone
  6. Betty Crocker® Fruit Roll-Ups® chewy fruit snack rolls (any flavor)
Instructions:
  1. Heat oven to 325°F. Grease and flour 2-quart round casserole or 2 1/2-quart ovenproof bowl. Make 1 box cake batter as directed on box. Pour into casserole.
  2. Bake 1 hour 5 minutes to 1 hour 15 minutes, or until toothpick inserted in center comes out clean. Cool 15 minutes. Remove cake from casserole; place rounded side up on cooling rack. Cool completely, about 1 hour. Make, bake and cool remaining cake mix using same casserole or bowl.
  3. With sharp knife, carefully slice piece from top of each cake to make flat surface where cakes will be placed together to form pumpkin shape. (Cake scraps can be saved and added to another recipe such as pudding or trifle if desired.)
  4. In medium bowl, place frosting; tint with 9 drops yellow and 6 drops red food color to make orange frosting. On plate, place 1 cake, rounded side down. Spread 2/3 cup of the orange frosting over cake almost to edge. Place second cake, rounded side up, on frosted cake to make round shape. Spread a thin layer of frosting over entire cake to seal in crumbs. For easier handling, refrigerate or freeze cake 30 to 60 minutes. Frost entire cake with remaining orange frosting.
  5. Trim ice-cream cone to desired height for stem; place upside down on cake. Cut out eyes, nose, mouth, vines and leaves from fruit snack rolls. Place on frosted cake to form face. Store tightly covered.
 
Both of these would kill it at a Halloween party for "Cute-Appeal!"
~Bridget

Monday, October 21, 2013

Candy Corn Jello Shots (Adult)

 Now these look yummy! Must make!


Photo: Candy Corn Jello Shots (adult)
www.holidaycottagepage.com/candy-corn-jello-shots-2/

Ingredients
  1. 2 large boxes lemon Jello
  2. 2 large boxes orange Jello
  3. 1 can whipped cream
  4. Vodka
  5. Candy corn (for decoration)
Instructions
  1. Prepare lemon Jello with 2 cups boiling water, 1 cup cold water and 1 cup vodka .
  2. Divide Jello into shot glasses and let chill in fridge for 4 hours.
  3. Prepare orange Jello with 2 cups boiling water, 1 cup cold water and 1 cup vodka .
  4. Divide Jello into shot glasses on top of the yellow layer and chill again for 4 hours.
  5. Top with whipped cream and candy corn when ready to serve.
~Bridget

Sunday, October 20, 2013

Healthy "Candy Corn" Fruit Parfaits

 I found this one on Skinnytaste and thought a healthy recipe would be appreciated in the midst of all the heavier ones.  What's great about this one, is you can serve it for any meal, or for a fun after-school snack.  It's also an acceptable "healthy" treat for school classroom parties.
You basically layer orange and yellow fruit in clear cups and top with whipped cream. I used mandarin oranges and pineapple because I love the combination, but you can also use mangoes, melon, oranges – whatever. These cute little jars I found in Home Goods are perfect to use as cups, but you can use clear disposable plastic cups if you are having a party.

For a whipped topping that is lighter than the average whipped cream yet not full of "fake" ingredients, I've been making this light whipped topping by whipping my cream and folding in Greek yogurt. It cuts the fat down and tastes delicious!

If you prefer to use whipped topping, go for it or if you want to have this for breakfast I say just top it with vanilla yogurt. But for dessert – I wouldn't change a thing! Hope you try this, you will LOVE it!!


Servings: 8 • Size: 1 parfait •Calories: 151 • Fat: 6 g • Carb: 23 g • Fiber: 1 g • Protein: 3 g • Sugar: 21 g  Sodium: 20 g  (without salt) • Cholesterol: 20 mg

For the Lighter Whipped Topping: (makes 1 1/2 cups)
  • 2 tablespoons sugar
  • 1/2 cup heavy whipping cream
  • 1/2 teaspoon vanilla
  • 1/2 cup fat free plain Greek yogurt (I used Chobani)
For Parfaits:
  • 2 2/3 cups diced pineapple (fresh or canned)
  • 2 2/3 cups jarred mandarin oranges, drained
Directions:

To make the lighter whipped cream, place a metal mixing bowl and metal beaters of a hand mixer into the freezer for 10 to 15 minutes.

Place the sugar into the mixing bowl and add the whipping cream. Using a hand mixer, beat just until the cream and vanilla reaches stiff peaks, about 2 - 3 minutes. Fold in the Greek yogurt.

In 8 oz jars or clear plastic cups place 1/3 cup mandarin oranges in each, then 1/3 cup pineapple.
Top each with 3 tablespoons of whipped cream.
YUM!

~Bridget

Saturday, October 19, 2013

Spider Chocolate Chip Marshmallow Cinnamon Pull-Apart

 
Ingredients:
  1. 1/2 cup butter, softened
  2. 2 cans (12.4 oz each) Pillsbury® refrigerated cinnamon rolls with icing
  3. 1/2 cup miniature chocolate chips
  4. 1/2 cup miniature marshmallows
  5. Orange gel food color
  6. Black licorice laces
  7. Large gumdrops
Instructions:
  1. Heat oven to 375°F. Using 2 tablespoons of the butter, generously grease 12-cup fluted tube cake pan. In small microwavable bowl, microwave remaining 6 tablespoons butter uncovered on High about 1 minute or until melted.
  2. Separate each can of dough into 8 rolls. Cut each roll into 4 pieces. Dip dough pieces into melted butter; arrange half of the dough pieces in pan. Sprinkle with chocolate chips and marshmallows. Top with remaining dough pieces. Bake 24 to 26 minutes or until light golden brown. Cool 2 minutes. Place heatproof platter upside down over pan; turn platter and pan over. Remove pan. Cool 20 minutes.
  3. In small bowl, place both cans of icing. Mix with food color until desired color. Drizzle icing over top of pull-apart. Using licorice and gumdrops, make small spiders. Place spiders on icing.
Notes:
 Mini chocolate chips and mini marshmallows in the middle make a rich tasty pull apart bread.

~Bridget

Cute Halloween Decorating Ideas From Pinterest

Halloween is one of my most favorite times of the year, I just love all the decorations and the change of the weather for Fall...it ushers in all the great family times....Thanksgiving, Christmas, lots of family birthdays in December, New Year, and finally Valentine's Day.  Halloween is just the kick-off to days off school and vacations with the kids and lighting fireplaces and watching movies with popcorn and blankets and hot chocolate!
 

I spent some time on Pinterest looking for some new and different decorations and wanted to share some of my favorites.  Let me know if you do any of these!
 I'm loving this cute Pumpkin Spider, made from three pumpkins and big sticks.  (I can see this as a cute little snowman too, a' la The Nightmare Before Christmas):
 
Maybe it's just my sense of humor, but I think this is hilarious!
 
I would SO go trick-or-treating at THIS house!

I'm really loving the idea of painting on the pumpkins rather than carving them and just being done with it.  No worrying about them rotting when you go this route.  Here are a few of my faves:


And finally...this is what we did:
 
How cute/creepy is this???
This is super cute for the kiddos, and one way to guarantee when they eat the sugar, they're also eating something healthy alongside of it:
 
...And I love this since it's a craft idea too!
  
I hope someone will do some of these things, they all are so darn cute!

~Bridget


Halloween Trifle With Pumpkin Mousse


Photo: Halloween Pumpkin Mousse
www.holidaycottagepage.com/pumpkin-mousse/


Ingredients:
  1. 5 large Egg Yolks
  2. 1 cup(s) Sugar
  3. 3 1/2 cup(s) Heavy Cream
  4. 15 ounce(s) Canned Pumpkin
  5. 2 teaspoon(s) Vanilla Extract
  6. 1 1/2 teaspoon(s) Ground Cinnamon
  7. 1/2 teaspoon(s) Ground Ginger
  8. 1/4 teaspoon(s) Ground Nutmeg
  9. 1/4 teaspoon(s) Salt
  10. 2 tablespoon(s) Dark Rum
  11. 1 teaspoon(s) Powdered Gelatin
  12. 3 ounce(s) Shaved Dark Chocolate
Instructions:
  1. Fill a large bowl halfway with ice water and set aside.
  2. Whisk the yolks, 3/4 cup plus 2 tablespoons sugar, and 3/4 cup cream together in a medium saucepan. Heat while stirring continuously with a rubber spatula or wooden spoon over medium-low heat, until thickened and the mixture coats the spatula -- about 10 minutes. Transfer to a medium bowl and set over the ice bath. Stir to cool.
  3. Add pumpkin, vanilla, spices, and salt to the egg mixture. Stir 1 tablespoon rum and 1 teaspoon gelatin together in a small bowl. Heat the remaining tablespoon rum, and stir in to the gelatin mixture until dissolved. Gently whisk into the pumpkin mixture. Beat 1/2 cup cream to stiff peaks, and fold into pumpkin mixture. Pour into a shallow dish, cover and chill until cold and thick enough to fall from a spoon in heavy dollops -- about 8 hours or up to overnight.
  4. Beat the remaining cream and sugar to stiff peaks. Alternately layer the pumpkin mousse and whipped cream in a glass serving dish. Sprinkle the chocolate shavings between top two layers. Serve chilled.

~Bridget

Reese's Peanut Butter Cup Monster Eyes

 These are so cute and super easy to make!
Photo: Reeses Peanut Butter cup Monster Eyes
www.holidaycottagepage.com/reeses-peanut-butter-cup-monster-eyes/
Ingredients:
  1. 36 REESE'S Peanut Butter Cups Miniatures
  2. White decorating icing in a tube
  3. Blue, green or other colors decorating gel in tubes
  4. Black decorating gel in a tube
Instructions:
  1. Remove wrappers from peanut butter cups.
  2. Use white frosting to outline and then fill in center to represent white portion of eyes. (Moisten a small brush with water and use to clean edges.)
  3. Use colored decorating gel to add colored area of eye. Add black gel to form pupil of eye. Refrigerate until ready to serve. Makes 36 monster eyes.
~Bridget

How To Make the Cutest Caramel Apples!

 Festive and easy for anyone in the family to help make!Photo: How to make Caramel Apples
www.holidaycottagepage.com/caramel-apple/

Ingredients:
  1. 6 apples
  2. Craft sticks
  3. 1 (14 ounce) package individually wrapped caramels, unwrapped
  4. 2 tablespoons milk
  5. water 
To Decorate:
  1. 1 cup chopped nuts
  2. 1 cup candy corn candies
  3. 1 cup mini chocolate chips
  4. 1 cup mini marshmallow
Instructions:
  1.  Bring 3 inches of water in a medium saucepan to a boil.
  2.  Insert a craft stick into the top end of each apple.
  3.  Dip the apples, 1 at a time, into the boiling water for 20-30 seconds, this will remove the wax coating on the apples. Dry thoroughly and place onto a sheet pan lined with parchment or wax paper.
  4.  Prepare the caramel by adding caramel candies and milk to a medium saucepan over medium heat. Stay close and stir often while the candies melt. Once melted, remove from heat and allow to sit about 1 minute.
  5.  Dip each apple in the caramel, turning slowly to coat. Continue to turn, allowing any excess to drip back into the saucepan.
  6. If desired, dip the bottoms of each apple into nuts, chocolate chips or other garnish.
  7. Cool apples completely on the prepared sheet pan then wrap individually and store for 2 to 3 days in an airtight container.

Caramel Apples are a MUST for any Halloween party!
~Bridget

Friday, October 18, 2013

Pumpkin Party Mix How-To. Great Party Favors to Make-And-Take For Kids!

Photo: Pumpkin Party Mix 
www.holidaycottagepage.com/pumpkin-party-mix/

Ingredients
  1. 2 cups Kix® cereal
  2. 2 cups small square pretzels
  3. 2 cups teddy bear-shaped chocolate graham snacks
  4. 1 cup freeze-dried cinnamon apples
  5. 1 cup candy-coated peanut butter pieces
  6. 1 box (7.5 oz) crunchy caramel-coated popcorn with peanuts
Instructions
  1. In large bowl, mix all ingredients. Store in airtight container.
  2. Wrap into orange tissue paper. Secure shut with green Florist tape.  Accent with Florist wire.

~Bridget

Monster Cookie Pops - Fun and Easy Recipe

Kids will have a blast decorating these simple, fun cookies!

Photo: Monster Cookie Pops 
www.holidaycottagepage.com/monster-cookie-pops-2/
Ingredients:
  1. 1 roll (16.5 oz) Pillsbury® refrigerated peanut butter cookies
  2. 14 craft sticks (flat wooden sticks with round ends)
  3. 1 container (12 oz) vanilla whipped ready-to-spread frosting
  4. Purple, green and blue neon liquid food color
  5. 1 tube (4.25 oz) black decorating icing
  6. Assorted candies for decorating; such as candy sprinkles, marshmallows, black licorice, red licorice ropes and gumballs.
Instructions:
  1.  Heat oven to 350°F. Cut cookie dough into 14 slices, 1/2 inch thick. Roll each slice into a ball. On ungreased cookie sheet, arrange 7 cookie dough balls in circle 3 inches apart and 2 inches from edge.  Securely insert 1 craft stick into each ball, with end pointing toward center of cookie sheet.  Repeat with another cookie sheet and remaining 7 cookie dough balls.
  2.  Bake 12 to 15 minutes or until golden brown. Cool 2 minutes; remove from cookie sheets to cooling racks. Cool completely, about 30 minutes.
  3.  Meanwhile, divide frosting among 4 bowls. Leave 1 bowl of frosting white; color remaining bowls with purple, green and blue food colors. Frost cookie pops; decorate with icing and candies as desired to form monster faces.

Thursday, October 17, 2013

Children's Place: Friends & Family Event - 30% off


 Friends & Family Event - 30% off

Coupon Code For Online Shopping:

Did your son outgrow his cold-weather clothing from last year? Find him everything he needs to stay warm and toasty this fall and winter from Children’s Place. Right now, you can use this Friends and Family coupon for 30% off your entire purchase. This coupon will even work on clearance items, stretching your savings up to 72%. Shipping is free on orders over $75; otherwise, it costs only $5. Take advantage of this offer now because it ends soon.
COUPON CODE:  OUR FRIENDS
Also valid:  FRIEND13

 Happy Shopping!
~Bridget

The Switch Witch (Save Your Kids From Halloween Candy Overload!)


 How do you handle Halloween Candy Overload in your house?
My son just got braces this year, and he, for one will NOT be partaking in all of the caramel/gummy/crunchy candy-madness this time around, thankyouverymuch.  Not to mention the amount of JUNK that goes into candy bars these days!  As long as I'm writing out the $130 check to Dr. Toolson each month, there will not be any corn syrup-y candy going into that boy's mouth when I'm not looking!    My other son is a complete sweet tooth and can barely contain himself with all of the candy he collects.  I'm pretty sure if I didn't monitor it, we would be reliving the ONE YEAR I actually let him put his Easter Basket in his room for ONE DAY, andthat night he threw up.  His comments:  "Ugh, I shouldn't have eaten all that candy in a day." What I discovered:  27 wrappers shoved behind his dresser.  Twenty-seven.  (He was 8).

 So what to do?  I mean, they want the candy and it's not "fair" to take it all away from them, right?  After all, they traipse all over the neighborhood sweating profusely in face masks and scratchy costumes, all for the unlimited amount of "free" candy they collect.  Last year the pillowcase from just one of my kids weighed a little under 8 pounds.  That's a whole lot of candy my friends.  That took hours to collect and his feet were killing him when he finally gave in and went to sleep.  And yet, I manage to get it away from them both, every year. How you ask???

Enter, the "Switch Witch!"  The Switch Witch is the Tooth Fairy's sister, a friendly good witch that comes in and takes your unhealthy candy and replaces it with a toy, or some other wanted item, along with healthier candy options.  In our home, she leaves "Unreal" candy, found at Target. 


It is candy just like the familiar favorites:  Reese's, Milky Way, M&M's and Snickers.  Just without the corn syrup, hydrogenated oils, GMO's, fake flavors and colorings, preservatives and gluten-free!

HOW DOES IT WORK???
The kids find this letter on the morning of Halloween:
 Switch Witch
I am the Switch Witch and I have a very special job to do on Halloween night. I take away sweets and junk from children and I swap them for good-for-you candy, lovely toys, stickers and shiny coins!
Late on Halloween night, when everyone is tucked up in bed, I fly through the sky on my broomstick looking for sweets.
If you would like a visit from me, leave your sweets on your kitchen table and I promise to leave you something nice.  Those nasty sweets rot your teeth and are very bad for you, so I’m ever such a nice witch!
You could also leave me a letter or a drawing – I love to hear about the spooky things that children get up to at Halloween. I collect the sweets in a large black sack that I carry on the back of my broomstick. My cat Tricksy flies on the back of my broom – she takes care of the sack and tells me when it is full.
I will only come to children who are fast asleep in bed – I am magic so don’t forget, so I’ll know if you are faking it!
                            Happy Halloween!!!  XO, The Switch Witch 


I know some orthodontists pay kids $5 per pound for candy also, which is a great option, but so your kids still get to actually enjoy some candy this Halloween, consider letting them "switch" some of it       out for more acceptable kinds, like Unreal.

              Chocolate Caramel Nougat Bar:
                  170 calories per regular sized bar
                    7 g fat
                    28 g carbs
                  130 mg sodium
                    19 g sugar


                4 g protein 
    Bonus: I can pronounce everything in it!
 ... Switch Witch by Pamela Hurd + GIVEAWAY | Reflections of a Book Addict

There's a cute book you can order off Amazon all about the Switch Witch also: 
http://www.amazon.com/s/?ie=UTF8&keywords=switch+witch&tag=mh0b-20&index=aps&hvadid=2012378139&ref=pd_sl_4znjsb8wzu_p


Happy Halloween!
~Bridget